How Can We Help?
Administrator Clock In/Out
This article is for Time Clock Administrators. You must have the “Time Clock Administrator” role active under “Time Clock Rights” in your member profile in order to use this feature.
About Administrator Clock In/Out
The Administrator Clock In/Out screen allows complete control over all time card entries / punches. You can edit existing time entries/punches or manually add time to any member’s time card.
If you’re editing a time entry via the Exception Report, this screen is also used.
Using the Administrator Clock In/Out
- Navigate to “Time Clock > Administration Clock In/Out”.
- Find Shifts – This optional tool can be used to locate a member’s scheduled shift. For example, if someone forgets to clock in, you can search for their shift date & time and then clock them in.
- Member – Select the member’s name. Note: If you’re editing a time entry via the Exception Report, you will not be able to edit the member’s name.
- Activity – Select an activity type. If “Other” is selected, complete the “Other” field.
- Pay Type – Select a pay type.
- Actual Start Date/Time & End Date/Time – This is the clock in and clock out time that the member entered. This can not be edited. This information is permanently retained for all punches for future reference.
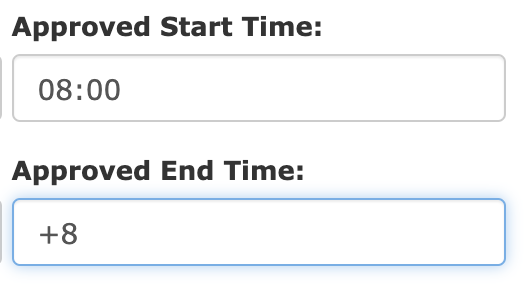
- Approved Start Date/Time & End Date/Time – This is the date/time that will appear on the member’s time card.
- Exceptions – If an exception already exists, the checkbox that corresponds with the exception type will be checked. The number of minutes will appear in the box next to the exception type. For information on exceptions, see this article.
- Comments – Enter pertinent comments. It is highly recommended that any modifications made by a Time Clock Administrator be documented here, including the initials or name of the individual making the change(s).
- Disposition – If there is a pending exception, you can adjust the disposition to “Complete”.
- Click “Clock In/Out”.
Pro Tip:
If you are manually adding time to someone’s timecard, you can enter a number of hours in the “Approved End Time” field and it will auto-calculate for you. For example, if you enter “0800” in the “Approved Start Time” field, you can enter “+8” in the “Approved End Time” field and it will automatically update the end time to 16:00.

